The Avalanche blockchain is an open platform for decentralized applications. It allows blockchain developers to deploy fast and low-cost applications written in Solidity. Avalanche also allows launching customized private and public blockchains that fit the requirements of your application.
The primary network of Avalanche has three chains: P-Chain, X-Chain, and C-Chain. The C-Chain (contract chain) is an instance of the Ethereum Virtual Machine and allows us to deploy and execute a smart contract the same way we would do on the Ethereum network.
 The main advantage of Avalanche is that it combines three specialized chains that are optimized for its specific purpose. Avalanche uses the Proof-of-Stake Consensus which is considered more energy-efficient and can process a larger number of transactions. This makes Avalanche one of the fastest blockchains in the crypto world that can perform at 4,500 - 20,000 transactions per second.
Just deployed new ERC720 smart-contract on ethereum. Cost $436.
Deploying a smart contract to the Ethereum network can be very expensive depending on the gas costs. The avalanche network can be a cheaper and more efficent alternative. Other popular alternatives to the Ethereum network are the Binance Smart Chain (BSC) and Polygon Network.
How to deploy to Avalanche?
To deploy a smart contract to the Avalanche blockchain we need to take care of three things: We need to configure a wallet, in this tutorial we use MetaMask, for the Avalanche blockchain. Then we need to get some funds to our wallet, we will use the test net for this tutorial and therefore show how to acquire test Avalanche Tokens (AVAX). The next step is to finally compile the smart contract written in Solidity to EVM-compatible bytecode and then deploy the contract to the Avalanche network.
How to deploy a smart contract to Avalanche?
- Configure Wallet (MetaMask) for Avalanche
- Get Avalanche Tokens (AVAX)
- Compile and deploy smart contract to Avalanche
Configure MetaMask for Avalanche
The MetaMask wallet supports by default only the Ethereum mainnet and the testnets Ropsten, Rinkeby, Goerli and Kovan. To use MetaMask with Avalanche we have to add new networks to it. This is done in the network settings of MetaMask, the images below show exactly the procedure.
First, we want to click on the image icon on the top right corner of MetaMask and then click on Settings.
 Then, the settings menu opens and we can click on Networks to open the network settings.
 Then we will see all the configured networks in our MetaMask wallet. By default, there will be only the Ethereum main net and the Ethereum testnets Ropsten, Rinkeby, Goerli, and Kovan. If Avalanche doesn't show up here, we have to add it manually by clicking on the blue Add Network button.

Avalanche Network Settings
After clicking the Add Network button we can enter the details of the new network we want to add to MetaMask. Avalanche has the Mainnet, a Testnet called FUJI, and can also be run locally. It is recommended to set up all three Avalanche Networks to be able to test contracts locally and on the test net before deploying them to the mainnet.
Avalanche Mainnet Network Settings
The network settings for the Avalanche Mainnet.
| setting |
Mainnet |
| Network Name |
Avalanche Mainnet C-Chain |
| New RPC URL |
https://api.avax.network/ext/bc/C/rpc |
| Chain Id |
43114 |
| Symbol |
AVAX |
| Block Explorer URL |
https://snowtrace.io/ |
Avalance FUJI Testnet Network Settings
The network settings for the
FUJI Testnet.
| setting |
FUJI Testnet |
| Network Name |
Avalanche FUJI Testnet C-Chain |
| New RPC URL |
https://api.avax-test.network/ext/bc/C/rpc |
| Chain Id |
43113 |
| Symbol |
AVAX |
| Block Explorer URL |
https://testnet.snowtrace.io/ |
Avalanche Local Testnet Settings
The network settings for the
Local Testnet.
| setting |
Local Testnet |
| Network Name |
Avalanche Local Testnet C-Chain |
| New RPC URL |
http://127.0.0.1:34890/ext/bc/C/rpc (adjust port number) |
| Chain Id |
43112 |
| Symbol |
AVAX |
Please make sure to remove whitespaces when copying the URLs into the settings. Otherwise
Invalid RPC URL or
Invalid Block Explorer URL will be shown.
Get Avalanche Tokens (AVAX)
The next step is to acquire Avalanche Tokens (AVAX). We will need the tokens later when we deploy our smart contract to the Avalanche blockchain to pay for the fees. For the test net we can get some free tokens but for the main net we have to pay the tokens at an exchange. For the local testnet, we can
use a pre-funded private key to get tokens.
In this tutorial we will deploy to the Avalanche FUJI test net and therefore use the
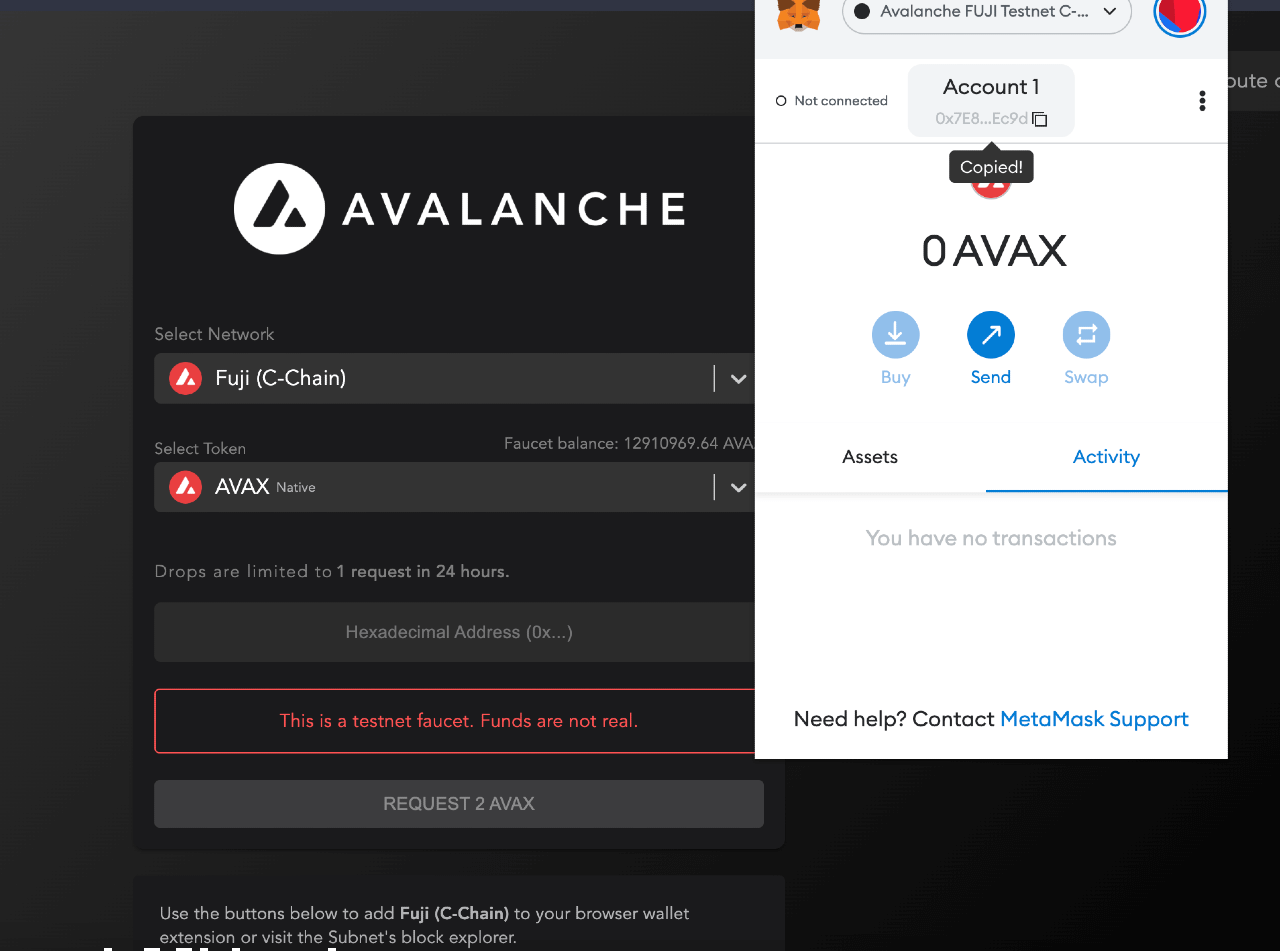
testnet faucet to acquire tokens. Unfortunately, the funds are not real and only valid on the test net but they will help us to pay the deployment fee. The test net faucet allows us to request 2 AVAX every 24 hours, that's enough to test and deploy our contract.
All we have to do the get the test net funds is to go to the
testnet faucet, copy our avalanche address from MetaMask, and paste it into the address field on the Avalanche faucet website. After clicking confirm the AVAX should appear within a few seconds in our MetaMask wallet. The transaction is pretty much completed immediately.
Please, make sure that the correct network is selected before pasting the avalanche address to the faucet.
Deploy contract to Avalanche Network
Finally, we can compile and deploy our contract to the Avalanche Network. In this tutorial, we will use the FUJI test net for deployment. The steps work in a similar way on the main net and the local test net. We will use the beginner-friendly remix IDE to demonstrate the process.
The first step is to compile the smart contract (use shortcut ctr+s). Then open the Deploy & Run tab in Remix (see screenshot below) and then select Injected Web3 as Environment. By default Remix deploys to JavaScript VM however we want to use MetaMask to deploy to the test net so we have to choose Injected Web3. If MetaMask is not yet connected to Remix a confirmation shows up asking you to confirm the connection between remix and MetaMask.

The next step is to click the deploy button in remix. It will be yellow or red depending on if the contract is payable or not. MetaMask will then show an estimated gas fee for the deployment and ask for your confirmation. Make sure that the correct network is selected in MetaMask. After clicking confirm the contract will be deployed to the FUJI testnet.

In this tutorial we have deployed a
hello world smart contract to the FUJI testnet. To learn more about the Solidity programming language, check our
Solidity tutorial about all aspects of Solidity.